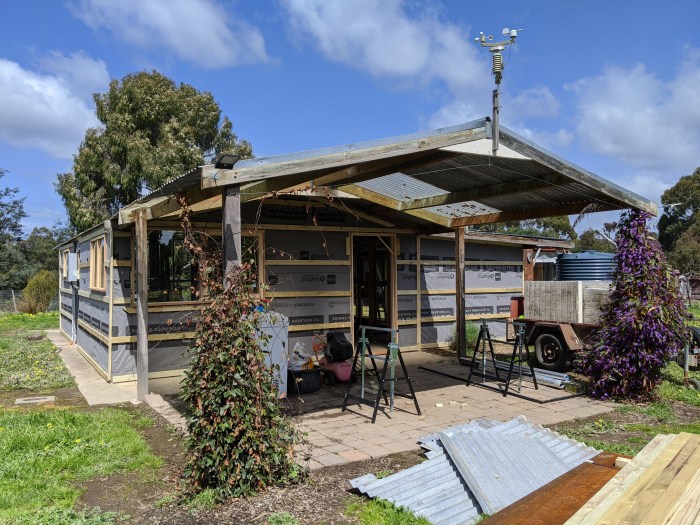
The shack has slowly been morphing into its new shape over the past few weeks. Matty has been busy putting up the timber frame and installing windows.
We were very conscious of the timber used for the framing as the site is prone to termite infestation, a problem we discovered whilst stripping the shack down. As such, all timber framing has been done with H3 grade timbers which are treated for moisture and insect resistance.
The windows and main door arrived about two weeks ago, and Matty has installed them into position already. These beautiful windows match the ones in the Nest, and are simply gorgeous. Being a hardwood timber frame, these will be oiled in early November so that they get weathered first.
The new section of the shack, i.e. the sleeping nook and bathroom/toilet now has a roof over it also. The bathroom is noticeably larger and will include a laundry section as well.
Matty has already started to wrap the external walls with building paper and timber slats so that the cladding can be installed. We’re getting a good sense of the amount of space and light available in this new design. Fingers crossed the external cladding will not disappoint!
North view of kitchen window and front door
North east view of the kitchen and front door, with timber slats and building paper in place
Eastern view of the kitchen and lounge, with timber slats and building paper in place
Bathroom, bedroom 3, lounge and kitchen windows on southern and eastern walls
Bathroom and bedroom 3 windows on southern wall
Bathroom and bedrooms 1 & 2 windows on southern and western walls
Inside view of lounge and kitchen area
Front wall view
Bedroom 3 and bathroom/toilet now has a roof
Bedroom 1 with window in place
Bedroom 2 with one side of the wall covered in building paper
Our first home on the property was loved (and lived in) by many; including mice, rats, huntsman spiders, humans, dogs, and even a micro bat! It was our humble home on the land while we built ‘The Nest’, and beat living in a caravan any day!
It was originally a work shed predating three owners before us; the bushfires of Black Saturday in Feb 2009 however changed this. The main house at the time burnt down and this shed was eventually turned into a makeshift home by a latter owner. This ‘man-cave’ boasted a lounge, kitchen and two modest bedrooms when we purchased the property. The bathroom was taken down due to breaching council regulations, but it was clear that a family of three or four lived here prior to us. We suspect that the two bedrooms were added in 2013 as the timber studs removed from here had the year marked on them.
Back in 2016, Matty and I spent about eight weekends at Cooinda prior to permanently moving here. We would spend weekends tweeking up the shack and making necessary modifications such as adding a bathroom and a makeshift composting toilet. The outside dunny was a 50 metre walk from the shack, as it was connected to the septic tank that existed from the old house on the property. A brave pilgrimage given that temperatures can drop to -7 degrees celsius in the middle of the night.
Our project is to turn this ramshackled living space into a much more attractive one. This shouldn’t be hard given the fake wood panelling, fraying filthy carpets, graffitied walls and blue coloured corrugated iron don’t stand as much competition. The layout will remain pretty similar, except for the kitchen and lounge areas swapping over and we’ll add another sleeping space, the new bathroom will also be slightly larger. Hopefully all our efforts in sealing the place will ensure that creepy crawlies can’t stray inside.
La Shacka Grande will become our self contained guest house, complete with 2.5 bedrooms (one bedroom is just big enough to house a single bed), full kitchen, bathroom and a proper composting toilet. Like any renovation project, our journey begins with stripping out all the unwanted crap. This means removing everything except the metal frame, the roof it supports and the solar panels that sit on top of it.
On Monday 20 July 2020 (on our four year engagement anniversary), we began with stripping off the floor coverings, internal wall coverings, cabinetry etc. We had power to the shack disconnected (for obvious reasons) prior to any work starting. The next month was spent stripping off all the layers that made this space up; including years of mice/rat poo laden insulation bats, termite eaten timber studs and all windows and doors. We will reuse any timber and corrugated iron sheets where possible, depending on their condition.
We have a rough schedule of 6 months to complete, and a budget of $25K. This project is a quarter of ‘The Nest’s budget with half the time to complete. This time around, we are making sure to stop and smell the almond blossoms. Here’s some photos (a bit too many) to show the progress.
Internal views
Main living area and kitchen – views to the front
View of the front whilst living in there
Filthy fraying carpets being removed
Partition wall still intact, with wallpaper removed from the windows
Main living area being stripped back
Front wall completely stripped back
Front wall view
Front wall intact
Front wall being dismantled
View of the front wall (or lack thereof)
Main living area and kitchen – views to the back
Views of the old kitchen whilst living in there
Carpets and underlay being removed
Partition wall starting to be removed
Partition wall partially removed
Bathoom removed
Back to bare bones
Internal partition wall
Internal partition wall starting to be stripped back
Most of the partition wall removed
Partition wall completely removed, along with the external stud work
Guest bedroom 1
Guest bedroom 1 before any work began. An amazing array of textures, colours and materials. Tell me you love it!
Guest bedroom 1 – off with the fugly carpet
Internal wall panels off, Aisha was very helpful!
Guest bedroom 1 – external walls off
Roof off
Guest bedroom 1 stripped to the core
Guest bedroom 2
Guest bedroom 2 – wall panels off
Guest bedroom 2 – only stud work remains
Guest bedroom 2 – back to barest bones
External views
Northern views
10 cubic metre skip for our first skip run
View from north side, prior to any renovating work.
View from north side with everything stripped back
North-east views
North east view with bedroom corro removed
North east view with all corro removed
North east view with all external bedroom studs removed
Southern views
South view prior to anything removed on the outside
South view with the bathroom and toilet totally dismantled and bedroom rooves taken off
South view with back and all side walls removed
South view of totally stripped back
South-west views
South west view prior to any external work
South west view with bathroom and toilet being dismantled
South west view with bathroom and toilet totally dismantled, and bedrooms stripped back
South west view of bedroom external stud work removed
South-east views of the eastern wall
South eastern view prior to anything being removed
South eastern view with windows removed
South eastern view with eastern wall removed
South east wall when all is stripped bare
South-east views of the southern side
South east view prior to anything removed
South east view with eastern wall removed
South east view with back wall removed
South east view of southern wall with all external studwork removed
Western views
Western view prior to anything being removed
Western view of bedroom walls removed
Western view of bedroom windows removed
Western view of bedroom external studwork removed
Eastern views
Eastern wall starting to be dismantled
Eastern view with all external stud work removed
All windows and doors
A collection of all mismatched doors and windows, now all gone to another home
Since the last coat of render, Cooinda’s Nest has been going through a slow and steady transformation. Who knew painting the plasterboard walls and ceilings could make the house look more like a home? Well I didn’t, but it is my first time building, so let’s excuse my ignorance. Matty and I have to keep reminding ourselves that there is yet more work to be done, till we can truly call it a day… or a year really.
Plastering joy
Matty used to be a plasterer for about 12 years, so this phase of the project ran pretty smoothly; albeit the frustrations of simply doing it. Within a week, Matty completed the base coat, first, second and last coat of plastering as well as sanding it all back.
Picasso will be impressed
Matty and I considered hiring a professional painter to give us a hand, as we are quite over the build process and just want it finished. Though as time ticked along, it seemed more prudent to do all the interior painting ourselves, and outsource only the exterior fascia and eaves. Help came from a painting/dirt-bike riding friend of Matty’s, Luke (aka Beefcake), whose expertise has helped us throughout this process. He was also generous enough to come for half a day to help Matty with the last coat of the ceilings. It’s taken 10 days to do all the interior painting, including undercoat, first and second coat. All render surfaces will remain as is, and the external painting will be completed in late spring to ensure that the paint dries well (the temperature cannot drop below 10 degrees to allow for this).
We surely didn’t feel like fainting from the paint fumes, that’s because there weren’t any! The Rockcote Ecostyle range is quite impressive with its zero volatile organic compounds (VOCs) certification. Colours come out beautifully too, and the texture is velvety. I didn’t think I could talk about paint like that before. Stop me before I become one of those <insert item> connoisseurs!
Windows prep continues
During this time, I have been cleaning window frames and sills in preparation for another coat of oil (interior) or varnish (exterior). This seemingly simple task took the following attempts to remove the render sticking into little crevices of the timber:
wiping them down with two types of sponges and water to remove any render (x 3 times)
wire-brushing areas to remove any sticky tape residue (once)
wet tooth-brushing (x 4 times)
There is still sanding to be done prior to applying the oil or varnish as well. These windows and sills had better look as if they have had at least 100 hours of labour put in them! I’m no domestic goddess, and this house is probably getting cleaned more now than it ever will be in its full lifetime. No joke.
9 (ish) week countdown
We have a rough estimate as to when we would like to move in, it is 2 Nov 2017, exactly one year since the slab pour. We don’t know whether this is feasible as there is a lot of bespoke work to be done. In somewhat of an order, here are the remaining tasks:
final fix electrical
tiling
final fix plumbing
grouting the crazy paving tiles
oiling the windows and window sills (interior)
varnishing the windows (exterior)
complete the in-ground fish tank
complete the open fire chimney and flue
full bathroom fit-out
full kitchen fit-out
painting the fascia boards and eaves
making the cabinetry for the walk-in-robes in both bedrooms
making our bed frame
making the bookshelves
building the pergola
landscaping
It’s quite an extensive list, but I feel more enthusiastic when I think about how far we’ve come in a relatively short period of time. Spring is on the way, and so is our home… can’t get sweeter than that :)
It has been an inspirational and exciting four weeks since the last post, getting so much done and being fortunate enough to receive much-needed (and appreciated) help from family.
Matty’s father and his partner, Di flew from New Zealand to give us a hand with cabinetry and other timber related features of the house, like the breakfast bar and the bathroom vanity. Both Matty and Dad got to play their talents whilst spending quality father-son time, which was really what it was all about :) Dad used to be a builder/carpenter back in the day, and Matty had wanted his help even before we bought Cooinda.
To top off all the achievements with Dad and Di, in no particular order:
Kitchen fit out and cabinetry – Dad and Di retrofitted the second-hand kitchen to suit our new home…but first we needed to move it from the main shed to the house. We all were happy to find that the kitchen fit our space like a glove, with some cutting and nailing of course ;) The timber surfaces still need the finishing touches like sanding and varnishing, but other than that, they’re good to go. The kitchen island, breakfast bar and bathroom vanity had to be taken to the main shed as we need to finish tiling first. Our neighbour Ken was kind enough to lend us his tractor for some of this heavy lifting.
Precarious moving tactics by Dad and Di, moving the kitchen from the shed to the house
Piecing it all together
Chookens in the kitchen
Second hand kitchen retrofitted
Breakfast bar in progress
The Breakfast bar is an old wool press about 100 years old, that needed some remodelling to suit our needs
Kitchen Island and Breakfast Bar
Brekky Bar with red gum top, the red gum top belonged to a bar prior to serving in its new home
The vanity table complete, this is an old wood working bench retrofitted to fit the bathroom space
Moving the wool press back in the shed for storage
The moving fun continues with Dad taking the stride
Internal and external doors – Matty constructed all three internal doors from recycled timber floor boards, he also made the door jams and frames and fitted in the one external timber door.
Matty and I cannot thank Dad and Di enough for taking 12 days out of their busy lives to come give us a hand. Not only did I get to meet the old man for the first time, but we all got to spend some quality family/ building time together. We can’t wait to see them both at our wedding next year! Yipee :D
Lock up
Less than a week since Dad and Di left, we also managed to get all the windows and main door (which is a double sliding door) mounted. This means that we are now sealed from the wintry frost and winds. We placed insulation blankets at the bottom of the back door and closed all windows and doors, to get a glimpse of the sound insulation properties, and we were not disappointed. Most if not all of the Hume Highway traffic was drowned out, a massive bonus! We are super happy with how the windows turned out, the Vic Ash timber varnished with natural oil really is stunning (I still need to do another coat of varnish) and the double glazing has definitely paid off :) Honourable mentions go to neighbours Cam and Benny Boy, whose help meant we got to reach lock down mode on Mother’s Day.
The only outside tasks that now remain are mounting the cement board sheets for the eaves and painting the fascia boards, and of course the third coat of render, but let’s put that one aside.
We are now at the precipice of the ‘finishing touches’ phase, and perhaps this part will take the longest…I know I know, there are things like plumbing, electrical work, tiling, painting, making window sills etc.; but some of these are the ornaments of the house, and we can’t wait to adorn her…
Internal doors facing the bedrooms or bathroom
Internal doors facing the living area
The back door
South facing windows mounted
Benny Boy and Matty mounting the first main kitchen window
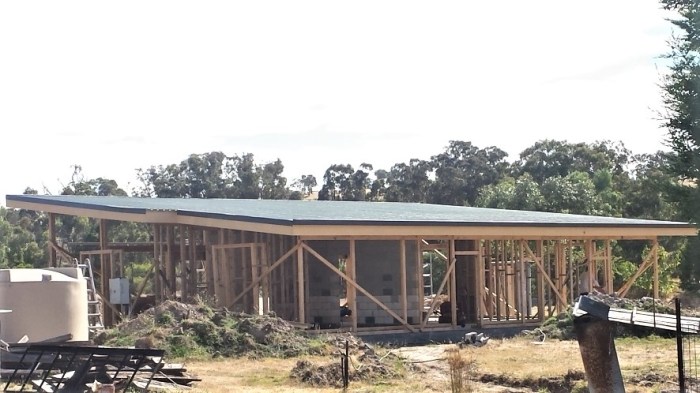
The last day of January marked another milestone on Cooinda, the roof sheets were put up! Three days later, Matty secured the flashing around the edges as well.
Tim, the plumber assisted Matty on the day. As the skillion roof is on a 6 degree single pitch, the gutter will only be on the south side of the house, where eventually a downpipe will feed a 10,000 litre rainwater tank. We then started work on the roof battens this weekend; this is the timber on the inside portion of the roof that holds up the ceiling plaster as well as the roof insulation bats.
Tim getting into it
Half way mark
13 metres of sheet haven
It’s hard yakka getting the sheets up
Nearly there
Missing the flashing
Roof sheets with flashing around the edges
Alongside the roof extravaganza, I managed to finish varnishing the remaining 3 large windows of the house, thus completing the first coat of varnish for all 10 windows. The second coat will be done once the windows are in the house.
The last window to be varnished
First coat of varnish done
It feels a little strange albeit the excitement; the house has become more grounded, more ‘real’ since the roof went up. There is a sense of security that was previously missing, and I find it hard to put into words how much a roof makes a difference. They don’t say “at least I have a roof over my head” for no reason.
It is Matty’s birthday next week, so we are off camping to a spot west of the Grampians for the weekend. Once back, we will be organising a delivery date for the straw bales… the adventure continues :)
The holiday season has come to an end, and it is bittersweet. On the sweet side, the thrill of seeing progress is addictive; the bitter side, progress will now slow down as we won’t be dedicated to building most of the time.
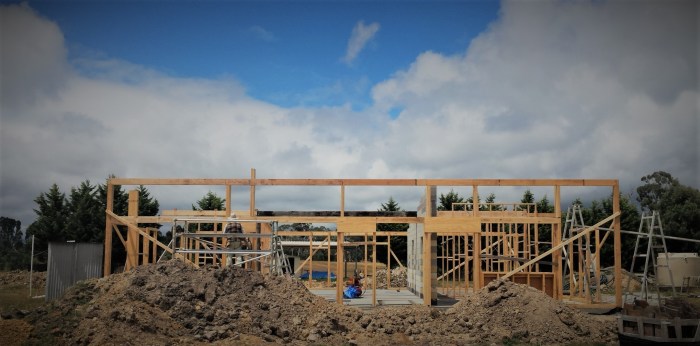
The front wall frame is the crowning glory of this post, albeit not yet complete; remaining are the back lintels and a few brackets to secure all the lintels in place. As you can see in the pics:
a) the posts were put up first, then
b) the ring beam and front lintels, and
c) the last of the bottom boxing
a) All front wall posts are up
b) Front wall frame with ring beam and front lintels
c) Front wall frame with bottom boxing
At 3.85 metres tall, the front north facing wall frames were a bit of a challenge, especially when it is just the two of us. I attempted to conquer my fear of heights by climbing up onto the scaffolding, but the dread and queasiness did not ease even after my third time of being up that high. I did manage to assist Matt despite my state of mind, though he mostly single-handedly secured all the lintels seen in the pictures. It was worth the sense of accomplishment we both felt at the end of New Year’s Day.
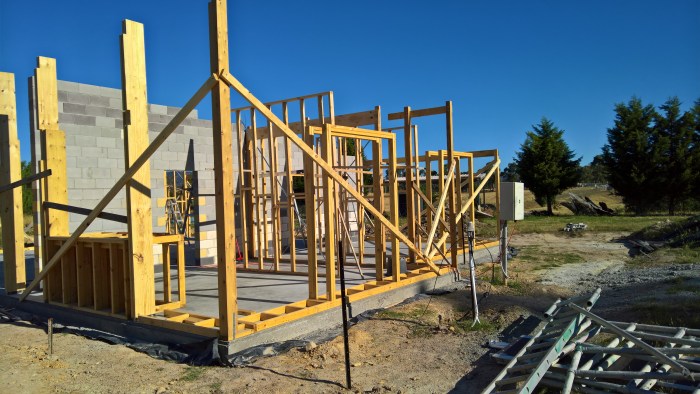
New Year’s Eve was spent putting up all front wall posts and bracing all the external wall frames properly; the temporary braces that were placed previously had to come off as they would interfere with strawbale insertion.
All braced up
During this past week I also focused my attention on varnishing 7 out of the 10 windows of the house, the remaining 3 are quite large and will require some kind of block and tackle contraption to secure it to the shed roof so that I can complete them. The windows are double glazed and made of beautiful Vic Ash timber.
Varnished windows, round 1: 7 finished, 3 more to go
Varnishing windows, round 1: 3 big ones at the back remaining
The pool got some of our attention during the break. The property originally came with a saltwater pool, however as saltwater pools are quite costly to run we opted for a freshwater pool instead. The entire saltwater unit was sold, including the two 2000 watt water pumps that were used as part of the system.
Prior to Christmas Day, we had spent several days draining and cleaning out the pool, setting up a natural filtering system using sand, a submersible 20 watt solar water pump, stones and a funky tree trunk with concrete trough feature to hold this filtering system in place. On Christmas Day, we spent several hours prepping water submersible plants to be put into the pool.
Pool with murky water and submerged plants visible
Funky water filtering system
The end outcome is somewhat like a pond, with plants sticking out of the now murky water. 2 cubic meters of crushed rock was placed in the pool to help resist algae growth, plus it feels amazing under your feet. The water is a bit murky than it will be in the future due to all the crushed rock. As time passes, the submersible plants and the crushed rock will assist in filtering the water as they act as a foundation on which microorganisms and bacteria attach to, both of which create an environment for water cleansing. These helpful inhabitants alongside the sand filtering system (in the trough) will eventually make the water clearer, but pristine most likely never.
We got to christen the pool on Christmas Day, and it has been getting our attention nearly on a daily basis since then; the perfect remedy after a hard day of labour in the sun :)
With so many little triumphs, it is hard not to feel excited about the year ahead. Every day brings forth a new challenge, and every day something new is conquered…. not always that easily but we try to be hopeful.
Happy new year dears, cheers to at least another 10 months of building!
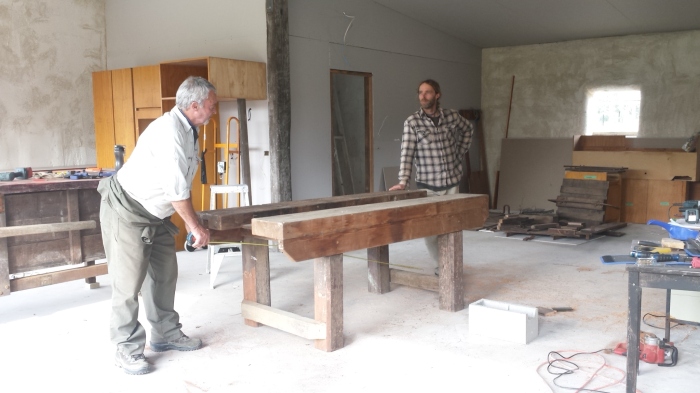
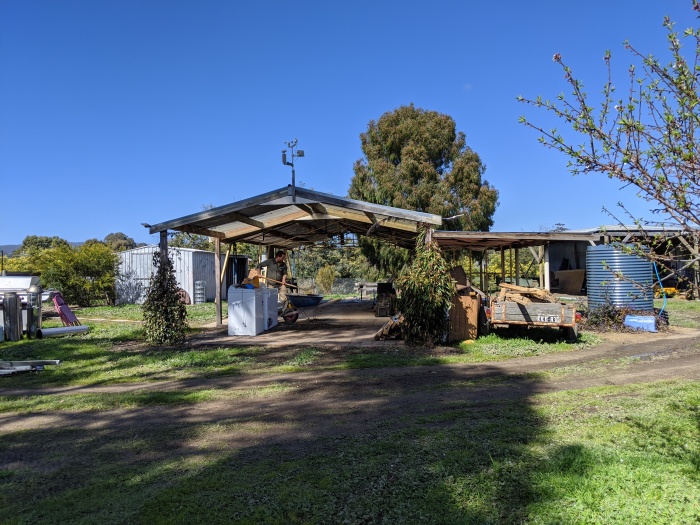
Sneak peek of Matt’s self-devised work bench and area, where most of the timber cutting (and other handy) magic happens!


")
")