Our first home on the property was loved (and lived in) by many; including mice, rats, huntsman spiders, humans, dogs, and even a micro bat! It was our humble home on the land while we built ‘The Nest’, and beat living in a caravan any day!
It was originally a work shed predating three owners before us; the bushfires of Black Saturday in Feb 2009 however changed this. The main house at the time burnt down and this shed was eventually turned into a makeshift home by a latter owner. This ‘man-cave’ boasted a lounge, kitchen and two modest bedrooms when we purchased the property. The bathroom was taken down due to breaching council regulations, but it was clear that a family of three or four lived here prior to us. We suspect that the two bedrooms were added in 2013 as the timber studs removed from here had the year marked on them.
Back in 2016, Matty and I spent about eight weekends at Cooinda prior to permanently moving here. We would spend weekends tweeking up the shack and making necessary modifications such as adding a bathroom and a makeshift composting toilet. The outside dunny was a 50 metre walk from the shack, as it was connected to the septic tank that existed from the old house on the property. A brave pilgrimage given that temperatures can drop to -7 degrees celsius in the middle of the night.
Our project is to turn this ramshackled living space into a much more attractive one. This shouldn’t be hard given the fake wood panelling, fraying filthy carpets, graffitied walls and blue coloured corrugated iron don’t stand as much competition. The layout will remain pretty similar, except for the kitchen and lounge areas swapping over and we’ll add another sleeping space, the new bathroom will also be slightly larger. Hopefully all our efforts in sealing the place will ensure that creepy crawlies can’t stray inside.
La Shacka Grande will become our self contained guest house, complete with 2.5 bedrooms (one bedroom is just big enough to house a single bed), full kitchen, bathroom and a proper composting toilet. Like any renovation project, our journey begins with stripping out all the unwanted crap. This means removing everything except the metal frame, the roof it supports and the solar panels that sit on top of it.
On Monday 20 July 2020 (on our four year engagement anniversary), we began with stripping off the floor coverings, internal wall coverings, cabinetry etc. We had power to the shack disconnected (for obvious reasons) prior to any work starting. The next month was spent stripping off all the layers that made this space up; including years of mice/rat poo laden insulation bats, termite eaten timber studs and all windows and doors. We will reuse any timber and corrugated iron sheets where possible, depending on their condition.
We have a rough schedule of 6 months to complete, and a budget of $25K. This project is a quarter of ‘The Nest’s budget with half the time to complete. This time around, we are making sure to stop and smell the almond blossoms. Here’s some photos (a bit too many) to show the progress.
Internal views
Main living area and kitchen – views to the front

View of the front whilst living in there

Filthy fraying carpets being removed

Partition wall still intact, with wallpaper removed from the windows

Main living area being stripped back

Front wall completely stripped back
Front wall view

Front wall intact

Front wall being dismantled

View of the front wall (or lack thereof)
Main living area and kitchen – views to the back

Views of the old kitchen whilst living in there

Carpets and underlay being removed

Partition wall starting to be removed

Partition wall partially removed

Bathoom removed

Back to bare bones
Internal partition wall

Internal partition wall starting to be stripped back

Most of the partition wall removed

Partition wall completely removed, along with the external stud work
Guest bedroom 1

Guest bedroom 1 before any work began. An amazing array of textures, colours and materials. Tell me you love it!

Guest bedroom 1 – off with the fugly carpet

Internal wall panels off, Aisha was very helpful!

Guest bedroom 1 – external walls off

Roof off

Guest bedroom 1 stripped to the core
Guest bedroom 2

Guest bedroom 2 – wall panels off

Guest bedroom 2 – only stud work remains

Guest bedroom 2 – back to barest bones
External views
Northern views

10 cubic metre skip for our first skip run

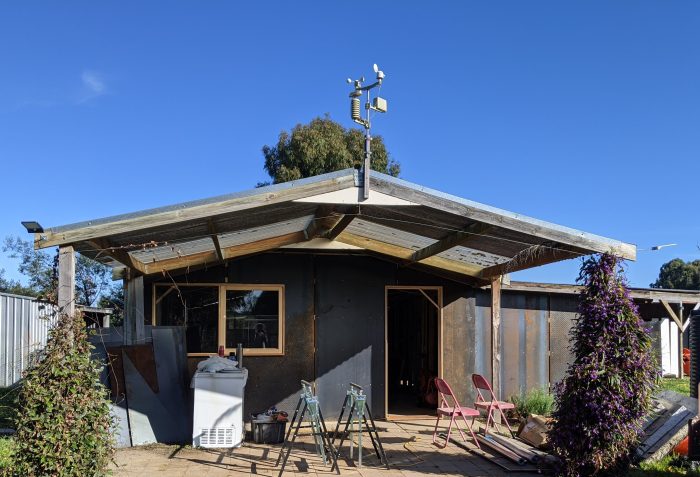
View from north side, prior to any renovating work.

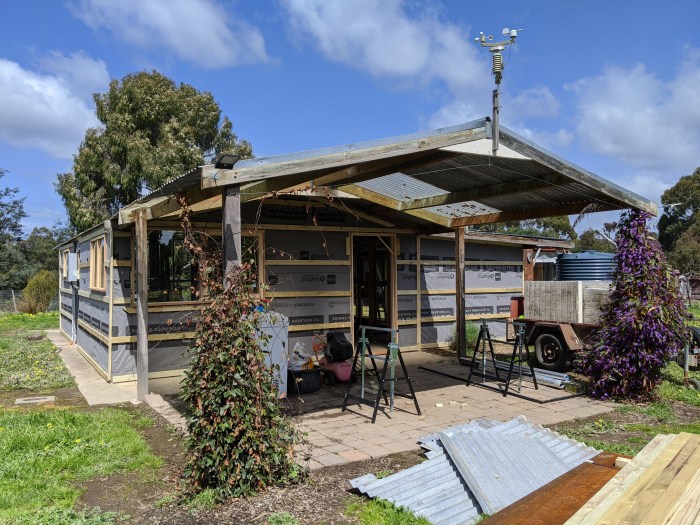
View from north side with everything stripped back
North-east views

North east view with bedroom corro removed

North east view with all corro removed

North east view with all external bedroom studs removed
Southern views

South view prior to anything removed on the outside

South view with the bathroom and toilet totally dismantled and bedroom rooves taken off

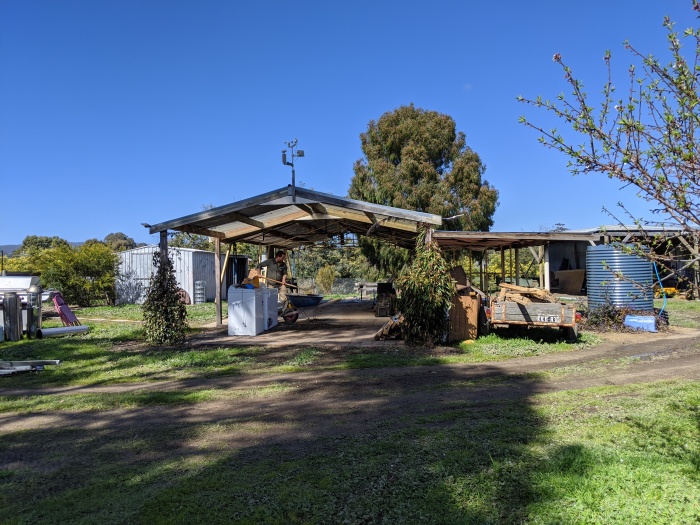
South view with back and all side walls removed

South view of totally stripped back
South-west views

South west view prior to any external work

South west view with bathroom and toilet being dismantled

South west view with bathroom and toilet totally dismantled, and bedrooms stripped back

South west view of bedroom external stud work removed
South-east views of the eastern wall

South eastern view prior to anything being removed
")
South eastern view with windows removed
")
South eastern view with eastern wall removed

South east wall when all is stripped bare
South-east views of the southern side

South east view prior to anything removed

South east view with eastern wall removed

South east view with back wall removed

South east view of southern wall with all external studwork removed
Western views

Western view prior to anything being removed

Western view of bedroom walls removed

Western view of bedroom windows removed

Western view of bedroom external studwork removed
Eastern views

Eastern wall starting to be dismantled

Eastern view with all external stud work removed
All windows and doors

A collection of all mismatched doors and windows, now all gone to another home