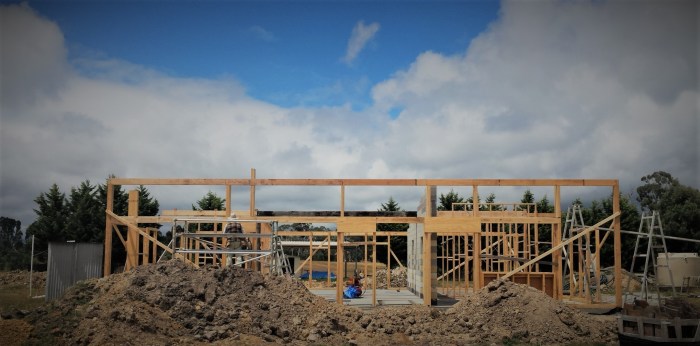
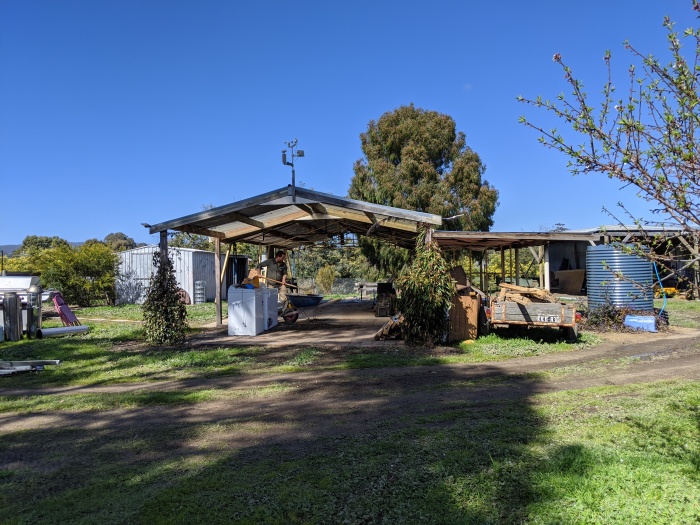
The shack has slowly been morphing into its new shape over the past few weeks. Matty has been busy putting up the timber frame and installing windows.
We were very conscious of the timber used for the framing as the site is prone to termite infestation, a problem we discovered whilst stripping the shack down. As such, all timber framing has been done with H3 grade timbers which are treated for moisture and insect resistance.
The windows and main door arrived about two weeks ago, and Matty has installed them into position already. These beautiful windows match the ones in the Nest, and are simply gorgeous. Being a hardwood timber frame, these will be oiled in early November so that they get weathered first.
The new section of the shack, i.e. the sleeping nook and bathroom/toilet now has a roof over it also. The bathroom is noticeably larger and will include a laundry section as well.
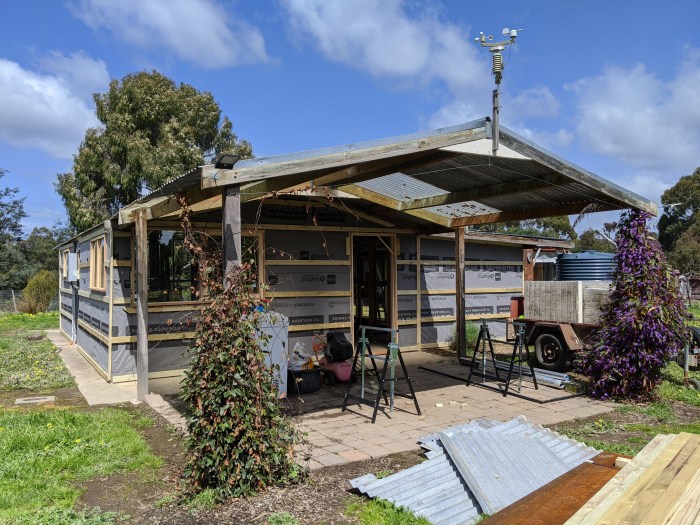
Matty has already started to wrap the external walls with building paper and timber slats so that the cladding can be installed. We’re getting a good sense of the amount of space and light available in this new design. Fingers crossed the external cladding will not disappoint!
North view of kitchen window and front door
North east view of the kitchen and front door, with timber slats and building paper in place
Eastern view of the kitchen and lounge, with timber slats and building paper in place
Bathroom, bedroom 3, lounge and kitchen windows on southern and eastern walls
Bathroom and bedroom 3 windows on southern wall
Bathroom and bedrooms 1 & 2 windows on southern and western walls
Inside view of lounge and kitchen area
Front wall view
Bedroom 3 and bathroom/toilet now has a roof
Bedroom 1 with window in place
Bedroom 2 with one side of the wall covered in building paper
Our first home on the property was loved (and lived in) by many; including mice, rats, huntsman spiders, humans, dogs, and even a micro bat! It was our humble home on the land while we built ‘The Nest’, and beat living in a caravan any day!
It was originally a work shed predating three owners before us; the bushfires of Black Saturday in Feb 2009 however changed this. The main house at the time burnt down and this shed was eventually turned into a makeshift home by a latter owner. This ‘man-cave’ boasted a lounge, kitchen and two modest bedrooms when we purchased the property. The bathroom was taken down due to breaching council regulations, but it was clear that a family of three or four lived here prior to us. We suspect that the two bedrooms were added in 2013 as the timber studs removed from here had the year marked on them.
Back in 2016, Matty and I spent about eight weekends at Cooinda prior to permanently moving here. We would spend weekends tweeking up the shack and making necessary modifications such as adding a bathroom and a makeshift composting toilet. The outside dunny was a 50 metre walk from the shack, as it was connected to the septic tank that existed from the old house on the property. A brave pilgrimage given that temperatures can drop to -7 degrees celsius in the middle of the night.
Our project is to turn this ramshackled living space into a much more attractive one. This shouldn’t be hard given the fake wood panelling, fraying filthy carpets, graffitied walls and blue coloured corrugated iron don’t stand as much competition. The layout will remain pretty similar, except for the kitchen and lounge areas swapping over and we’ll add another sleeping space, the new bathroom will also be slightly larger. Hopefully all our efforts in sealing the place will ensure that creepy crawlies can’t stray inside.
La Shacka Grande will become our self contained guest house, complete with 2.5 bedrooms (one bedroom is just big enough to house a single bed), full kitchen, bathroom and a proper composting toilet. Like any renovation project, our journey begins with stripping out all the unwanted crap. This means removing everything except the metal frame, the roof it supports and the solar panels that sit on top of it.
On Monday 20 July 2020 (on our four year engagement anniversary), we began with stripping off the floor coverings, internal wall coverings, cabinetry etc. We had power to the shack disconnected (for obvious reasons) prior to any work starting. The next month was spent stripping off all the layers that made this space up; including years of mice/rat poo laden insulation bats, termite eaten timber studs and all windows and doors. We will reuse any timber and corrugated iron sheets where possible, depending on their condition.
We have a rough schedule of 6 months to complete, and a budget of $25K. This project is a quarter of ‘The Nest’s budget with half the time to complete. This time around, we are making sure to stop and smell the almond blossoms. Here’s some photos (a bit too many) to show the progress.
Internal views
Main living area and kitchen – views to the front
View of the front whilst living in there
Filthy fraying carpets being removed
Partition wall still intact, with wallpaper removed from the windows
Main living area being stripped back
Front wall completely stripped back
Front wall view
Front wall intact
Front wall being dismantled
View of the front wall (or lack thereof)
Main living area and kitchen – views to the back
Views of the old kitchen whilst living in there
Carpets and underlay being removed
Partition wall starting to be removed
Partition wall partially removed
Bathoom removed
Back to bare bones
Internal partition wall
Internal partition wall starting to be stripped back
Most of the partition wall removed
Partition wall completely removed, along with the external stud work
Guest bedroom 1
Guest bedroom 1 before any work began. An amazing array of textures, colours and materials. Tell me you love it!
Guest bedroom 1 – off with the fugly carpet
Internal wall panels off, Aisha was very helpful!
Guest bedroom 1 – external walls off
Roof off
Guest bedroom 1 stripped to the core
Guest bedroom 2
Guest bedroom 2 – wall panels off
Guest bedroom 2 – only stud work remains
Guest bedroom 2 – back to barest bones
External views
Northern views
10 cubic metre skip for our first skip run
View from north side, prior to any renovating work.
View from north side with everything stripped back
North-east views
North east view with bedroom corro removed
North east view with all corro removed
North east view with all external bedroom studs removed
Southern views
South view prior to anything removed on the outside
South view with the bathroom and toilet totally dismantled and bedroom rooves taken off
South view with back and all side walls removed
South view of totally stripped back
South-west views
South west view prior to any external work
South west view with bathroom and toilet being dismantled
South west view with bathroom and toilet totally dismantled, and bedrooms stripped back
South west view of bedroom external stud work removed
South-east views of the eastern wall
South eastern view prior to anything being removed
South eastern view with windows removed
South eastern view with eastern wall removed
South east wall when all is stripped bare
South-east views of the southern side
South east view prior to anything removed
South east view with eastern wall removed
South east view with back wall removed
South east view of southern wall with all external studwork removed
Western views
Western view prior to anything being removed
Western view of bedroom walls removed
Western view of bedroom windows removed
Western view of bedroom external studwork removed
Eastern views
Eastern wall starting to be dismantled
Eastern view with all external stud work removed
All windows and doors
A collection of all mismatched doors and windows, now all gone to another home
The holiday season has come to an end, and it is bittersweet. On the sweet side, the thrill of seeing progress is addictive; the bitter side, progress will now slow down as we won’t be dedicated to building most of the time.
The front wall frame is the crowning glory of this post, albeit not yet complete; remaining are the back lintels and a few brackets to secure all the lintels in place. As you can see in the pics:
a) the posts were put up first, then
b) the ring beam and front lintels, and
c) the last of the bottom boxing
a) All front wall posts are up
b) Front wall frame with ring beam and front lintels
c) Front wall frame with bottom boxing
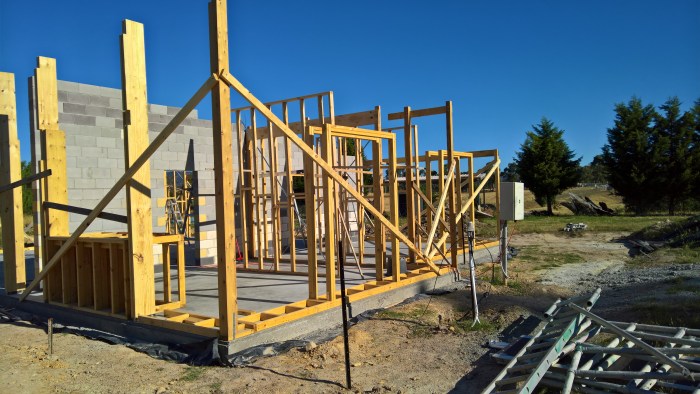
At 3.85 metres tall, the front north facing wall frames were a bit of a challenge, especially when it is just the two of us. I attempted to conquer my fear of heights by climbing up onto the scaffolding, but the dread and queasiness did not ease even after my third time of being up that high. I did manage to assist Matt despite my state of mind, though he mostly single-handedly secured all the lintels seen in the pictures. It was worth the sense of accomplishment we both felt at the end of New Year’s Day.
New Year’s Eve was spent putting up all front wall posts and bracing all the external wall frames properly; the temporary braces that were placed previously had to come off as they would interfere with strawbale insertion.
All braced up
During this past week I also focused my attention on varnishing 7 out of the 10 windows of the house, the remaining 3 are quite large and will require some kind of block and tackle contraption to secure it to the shed roof so that I can complete them. The windows are double glazed and made of beautiful Vic Ash timber.
Varnished windows, round 1: 7 finished, 3 more to go
Varnishing windows, round 1: 3 big ones at the back remaining
The pool got some of our attention during the break. The property originally came with a saltwater pool, however as saltwater pools are quite costly to run we opted for a freshwater pool instead. The entire saltwater unit was sold, including the two 2000 watt water pumps that were used as part of the system.
Prior to Christmas Day, we had spent several days draining and cleaning out the pool, setting up a natural filtering system using sand, a submersible 20 watt solar water pump, stones and a funky tree trunk with concrete trough feature to hold this filtering system in place. On Christmas Day, we spent several hours prepping water submersible plants to be put into the pool.
Pool with murky water and submerged plants visible
Funky water filtering system
The end outcome is somewhat like a pond, with plants sticking out of the now murky water. 2 cubic meters of crushed rock was placed in the pool to help resist algae growth, plus it feels amazing under your feet. The water is a bit murky than it will be in the future due to all the crushed rock. As time passes, the submersible plants and the crushed rock will assist in filtering the water as they act as a foundation on which microorganisms and bacteria attach to, both of which create an environment for water cleansing. These helpful inhabitants alongside the sand filtering system (in the trough) will eventually make the water clearer, but pristine most likely never.
We got to christen the pool on Christmas Day, and it has been getting our attention nearly on a daily basis since then; the perfect remedy after a hard day of labour in the sun :)
With so many little triumphs, it is hard not to feel excited about the year ahead. Every day brings forth a new challenge, and every day something new is conquered…. not always that easily but we try to be hopeful.
Happy new year dears, cheers to at least another 10 months of building!
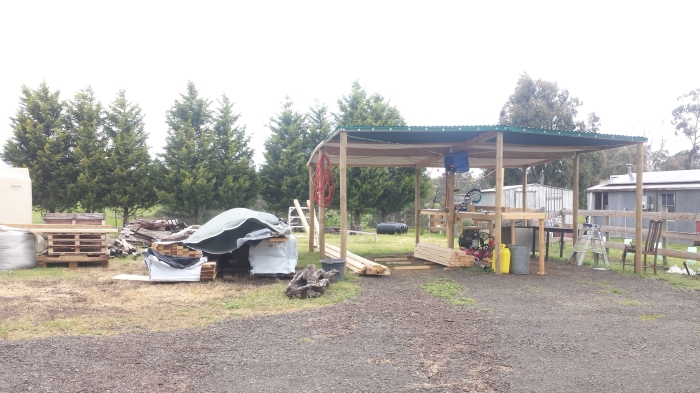
Sneak peek of Matt’s self-devised work bench and area, where most of the timber cutting (and other handy) magic happens!
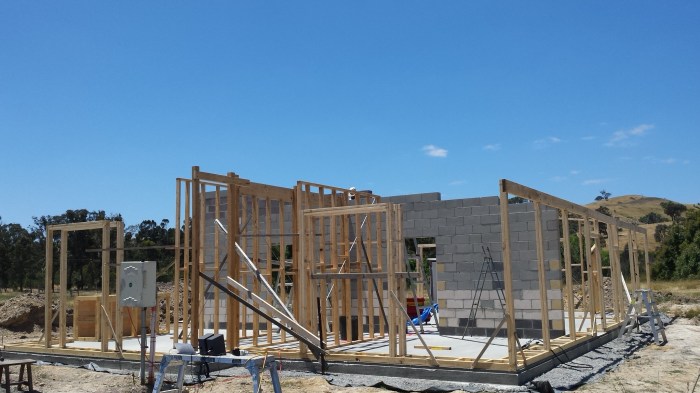
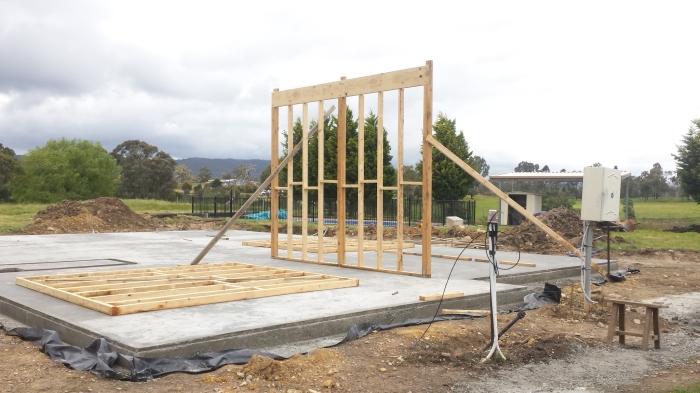
Today marks the 3 month lunaversary since the day we first started prepping the site for the build, and not even 2 months have passed since the slab was poured. I think we are making good headway, but Matt seems to think otherwise….
The external timber frame has been progressing nicely, now with most of the bottom boxing and window lintels in place. The back south-facing wall frame is also ready for bales to be put in.
South facing external wall frames ready for strawbale insertion
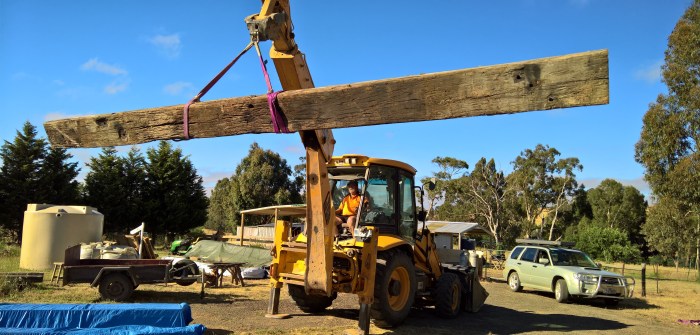
The front wall frames are yet to be done, they measure up to 3.85m in height and require many posts and beams that will provide structural support for the sloping roof and the massive north facing windows. Before these can be put into place, a major hurdle of placing the 6.5m long ironbark timber beam in the middle of the house had to be completed. This beam is estimated to weigh about 1 tonne, and is integral to the house structure. This nerve wrecking task was successfully administered yesterday, once again with our excavator acquaintance, Bert (who loves dirt)…
Matt cutting out the besser block for the ironbark timber beam
Redgum post ready to support the other side of the ironbark beam
It’s up in the air!
Bert putting the massive beam into place
Bucket filled with dirt to prevent the excavator from tipping forward
Ironbark beam securely in place
The holiday season gives us a chance to work with no interruptions on aiming to have all the external wall frames put in place. Now that some warmer weather is finally on the way, hopefully the swimming pool will get some of our attention too!
Happy holidays lovely peeps and thanks for keeping up with our adventure.
Lots of love from our shack to yours :D xoxo
It’s exciting times at Cooinda. The timber required for the framing arrived exactly a week after the slab pour, and Matty has been analysing the specs to make sure he has enough timber, the right lengths, cuts, types etc.
He’s been sawing, chiseling and hammering away, like a carpenter….. I’m sure his father will be proud :)
Timber delivered and covered
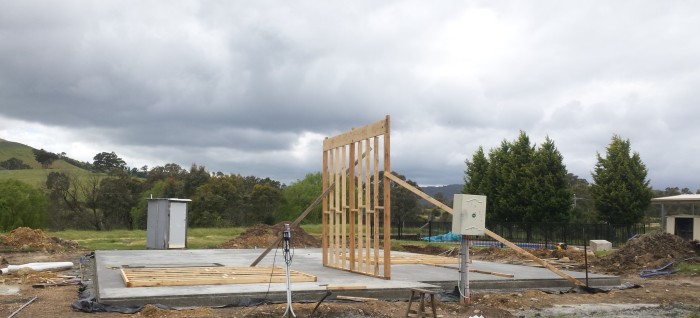
After a weekend of hard yakka, the internal walls for the bedrooms are done, this includes the walk in robe walls in each bedroom (laid down in the pics) as well as the wall that separates the two bedrooms.
Yesterday, with the help of our friend Bart(os), the first internal wall frame was put up, now neatly braced and supported. Can’t wait for all of them to be up and get a real sense of space!
First internal wall frame up, separating the two bedroomsNo one else will find these angle shots as sexy as we do!Quite so, this is the angle from behind the house
Enough about the wall frame, here’s hoping that all family and friends are safe in New Zealand after the quakes, and that we all get to see the supermoon tonight!


")
")