View from the NE mulch bed Sep 2019

Home sweet home

It’s been a while since the last post, and I have very good reasons. 1) Settling in takes some time, and 2) Matty and I got married (on the property)…YAY!  Now that the dust has settled (literally), I bring to you our very last post for the build.

Nesting life

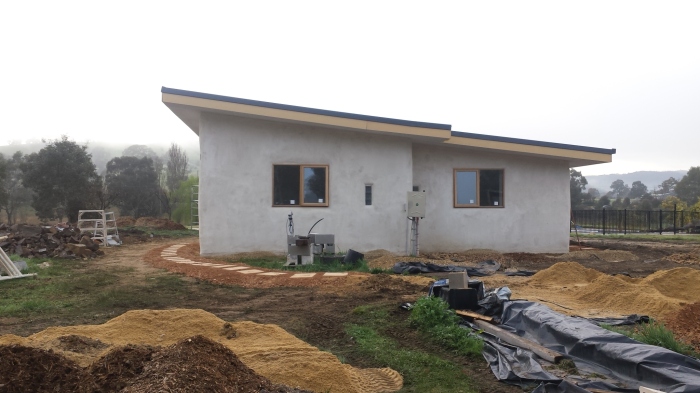
We moved in on Saturday 9th of December 2017; exactly 1 year, 1 month and 1 week since the slab was poured. Our first night sleeping in the house felt like we were in a hotel, we weren’t used to such luxury. We can honestly say that the house has exceeded our expectations. The space was made to suit our functional, aesthetic and philosophical needs, and it has excelled in all three. It is easy to live in, and life has become serene; the house brings with it a calmness that is hard to put into words.

We have experienced a scorching hot 41 °C  summer day and a cool 7 °C autumn morning, and the temperature remains within 22 °C and 26 °C without any air-conditioning or heating. The colder months are yet to come, but with the fireplace going I think we will be ok. I suspect the stable temperature does something to your nerves and senses; it is subliminal and soothing. I never know how hot or cold it is outside unless I check the weather monitor or step outside.

Building retrospection

Owner building is daunting, though not an impossible task. It worked out well that Matty is extremely handy and practical, not to mention a fantastic Project Manager (that’s part of his job role so it makes sense). I will also add that I am a very good sidekick, rant listener, food maker/feeder, choresperson and all-rounder helper. We make a good team. But why owner build when we could contract a builder? We had a few reasons:

  • Being part of the build process

I have always felt that when something is done for personal reasons (with love and care), the thing created has a charm that no amount of money or expertise can create. I’ve lived in many shared houses in my time, and the places that were the most ‘homely’ were the ones where the owner had done something personal to the place, and worked on it with their own hands. Sounds very new-agey I know, but there is no scientific way to express it.

Matty grew up in a family of builders, carpenters, and other handy tradespeople. It was inevitable that he be succumbed with the idea of creating a home of his own one day, and leaving a mark on the Earth that he so wants to protect and nurture. It was an idealistic dream for the both of us.

  • Learn skills

Building a shelter for yourself is one of those archaic skills that we don’t seem to be bothered by anymore, but this is something I felt I lacked as a human being. Plus, learning a new skill generally does not hurt anyone, though I doubt we’ll ever endeavour grouting sandstone tiles again.

  • Save money

We didn’t want a massive mortgage, so moving rural and building our home ourselves was the logical option. Some of the ways that we saved on costs (beyond the obvious) are as follows:

Buying as many second-hand and recycled materials as possible; including cabinetry, furniture and appliances. This of course is not just a cost saving exercise, but also ties in with our sustainability and anti-consumerism principles.

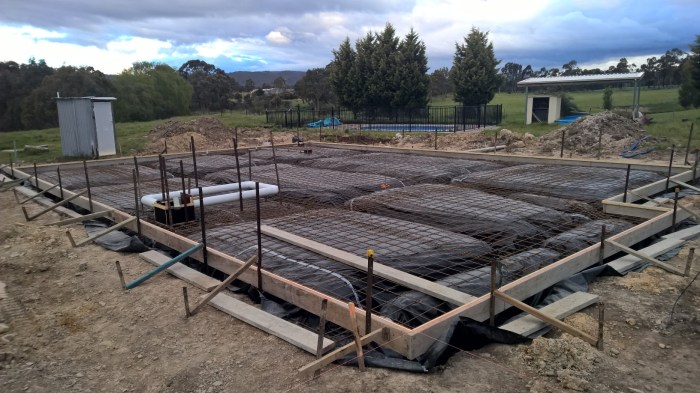
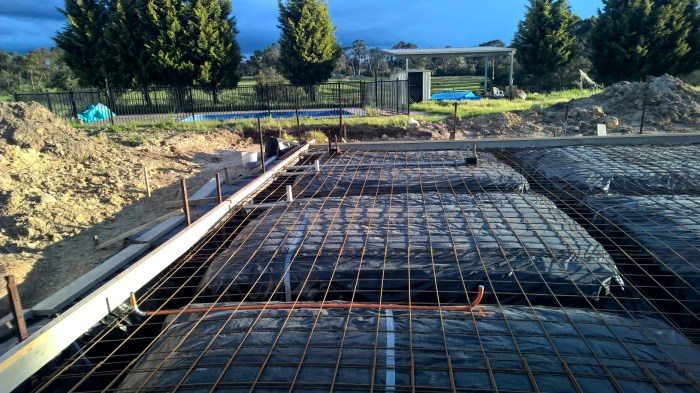
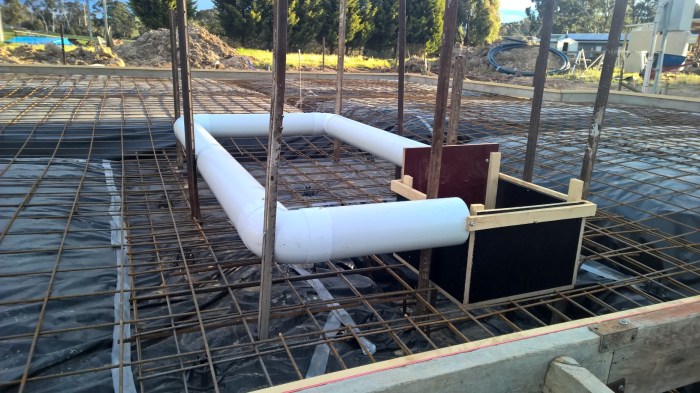
Matty being ‘hands on’ even on contracted jobs such as concreting, plumbing, electrical, roofing and guttering, and buying as many of the materials himself. For example, we saved about $12,000 AUD  during the slab pour stage by Matty assisting the concreters by setting up the site. The cost saving is based on the quotes we received for doing most of the work leading up to the slab pour ourselves, versus how much it would be if we relinquished all responsibility to the concreting mob.

Show me the money

We spent approximately $110, 000 AUD for the build; this includes all building materials, paying contractors and final fit out. We went 10% over our original budget but we were anticipating this anyway, watching all those Grand Design episodes prepared us :D

I should add that ‘time is money’. Matty and I had no time to ourselves outside of the build, excluding work and family. Though $110, 000 AUD is a relatively small amount for a build, the mental exhaustion and lack of social life needs to be factored in.

The end, kind of…

We are over the moon that we are finally nesting; but the property and this house is a never-ending project, so the journey has just begun. I have thoroughly enjoyed documenting the build process, thank you for being part of something so close to home :D Ha!

Lots of love from our nest to yours xo

Western view of the house

And so it continues… on another Spring Equinox

One year. One year since we started this journey, well the idea was conceived before then but practical work started exactly one year ago. Cooinda’s Nest was fertilised. Rightly so, the earth where the house would sit was dug up and the entire place smelt like cow poo. It was fertilised alright! :D :D

Fast forward one year, and we are on the brink of completion. The last few weeks have been filled with a variety of tasks; different elements are integrating and turning the building into a livable space.

Kitchen makeover

The second-hand kitchen we purchased a while back had an orange veneer on it, too reminiscent of the kitsch 70’s era. Naturally, Matty and I didn’t want to go for the ‘spray tan gone wrong’ look, nor did we want to be reminded of Oompa Loompas every time we laid eyes on the kitchen. So what to do?

We thought of applying another layer of veneer, though this would have been tricky. After much research and thought, we thought repainting it would fix it. Matty came across Alan Grimes, a specialist in unique timber finishes and stains, we heeded his advice and are so happy for it. Look at the pictures and see for yourself! A natural grey stain seems to have modernised it.

The rangehood was erected with the help of our dear friend Shorty. It reminds me of a top-hat, apparently floating mid-air. There is no flue connecting it to the ceiling as creating another gap in the roof and ceiling would have meant additional work. We opted for a recirculating rangehood that contains a charcoal filter as the alternative. The copper rangehood is second-hand too; we love its rustic look, and it complements other elements in the house. Kitchen and laundry tapware were plumbed in, and the electric oven was connected also.

Landscaping

Matty spent 15 hours on a hired dingo after Rob (the Earthworks guy) did his magic. Holes have been dug for future fence posts and gates, as well as trenches for ag-pipes to be placed in. These ag-pipes will help direct water away from the house and into the numerous swales that have been dug up. The swales will also function as mini water features which will house native and indigenous plants to attract wildlife.  The following ingredients were thrown in the mix and have been used in a variety of ways:

  • oversized Lancefield rock
  • Bullalo river rock
  • oversized river pebbles
  • Donnybrook toppings

There are now paths leading from the carport area to the front and back doors of the house; the gate and fencing will be done later. These are not required for the Certificate of Occupancy (CofO) inspection, so we are in no hurry.

Shelving

Shelves around the house have been sanded, oiled or just screwed into place in the bedrooms, walk-in-robes (WIRs), kitchen and main living area. We’re starting to have some storage space.

Tiling

Neither Matty nor I have done tiling before, and we didn’t want to make any mistakes with the wet areas. So we hired a local tiler, Laurie for 2 days to:

  1. give us some advice with non-wet areas so that Matty and I can complete them
  2. do the wet areas so that they are ready for the CofO inspection.

We’ve only just started, and think it will take about 2-3 weeks to finish the whole house. Only the bathroom floor has been tiled thus far.

In-ground fish tank

The glass for the fish tank was finally ready, so Matty picked it up last week and did the preliminary work of placing them into position, putting on a rubber seal and securing them with tile edges.

Windows

Once the bane of my existence, the interior windows are now finally complete with oil (including the window sills). I hope I don’t have to do anything beyond look through them for the next several years.

COUNTDOWN Continues

Our desired date of moving in remains to be 2 Nov 2017; however we have booked in the CofO inspection for the 9th of Oct. Not every task needs to be completed for this, so here’s a breakdown of work to be completed before and after.

Before CofO inspection Before moving in After moving in
Tiling the kitchen and bathroom Tiling the main living area and bedrooms, including around the fish tank Painting the external fascia boards and eaves
Tiling the fireplace hearth Making our bed frame Varnishing and cleaning the window frames (exterior)
Electrical work for rangehood and aircon Finishing the cabinetry for the walk-in-robes in both bedrooms Making the bookshelves
Final fix plumbing  Grouting the crazy-paving wall tiles and hearth Building the pergola
Full kitchen fit-out with island bench and hobs Completing the landscaping including fences and gates
Full bathroom fit-out with toilet, vanity and bath
Completing the open fire chimney and flue
Finishing off guttering, grey water treatment system & rainwater tank setup

There’s a lot to be done within 2 weeks, but thankfully our energy and drive have skyrocketed; being so close to the finish line has its benefits ;)

Fish tank setup and pre pour jitters

Less than 12 hours to go till the concrete truck arrives and the pour begins.  Matty and I are feeling excited, nervous, worried, exuberant all at the same time.  A minor (major) crisis was averted today as Matt found out that the formwork was 40 mm shy of the expected height.  A somewhat cruisy day turned out to be a full on day fixing other people’s stuff ups.

Despite the frustrations, Matty managed to get everything done for the 7am start tomorrow morning (along with extending the height of the formwork to the required 100mm).  Here are some pics to commemorate the day:

Full underslab ready to go, with bracing, fish-way channel and other bits
Underslab ready to go with electrical conduits and pipes

This house has a few little quirks, but the most extravagant is probably the in-ground fish tank.  Matt got the fish-way channel set up so that the fish can swim within the house (initially), and then outside when we open up the channel to connect to the outside fish pond.

Fish-way channel
Fish-way channel
Fish-way channel secured on the underslab

Now all that remains is all things to go smoothly tomorrow.  The rain has eased, hopefully so will our anxious trepidations.