Two and a half weeks ago the first round of strawbales were delivered, and then four days later, the second batch. All up we have 350 bales in our possession, and they are more than enough for the house… a few will be leftover which will get used in the chook pen, much to the chooks’ delight I’m sure!

Laying it all down
When building the strawbale walls, it may seem simple enough to plonk the bales on the bottom boxing and then layer them as you build height, but there’s more to it than that. Here’s a list of things to consider:
- side of the bale facing the inside or the outside of the house, and each row must alternate from the previous one to ensure that the wall doesn’t bow. This is due to the fact that the bales have a more compact side and another fluffier side, thanks to the machine that cuts them
- notches must be cut out of the bales when there are timber frames in the way
- bales will need to be cut to size (using a bale needle) to fit into places
- bales are always laid in a running bond (brick like manner) for sturdiness
Saying all this however, I feel that this part of the build was one of the most satisfying as progress happens relatively fast. It’s instant gratification when you see the house of your dreams literally being conjured up in front of you, after a lot of huffing and puffing of course…yes I HAD to throw that in there ;)
Feeling the tension
One of the more common questions we get about using strawbales is its fire risk. Living in rural Victoria this is obviously something that we took into account, especially as the previous house on the property had burnt down during Black Saturday.
Loose straw is extremely flammable, strawbales are also flammable however the earthen render that will cover them eventually negates this risk. The strawbales get tensioned down to make them dense, which helps remove air pockets and transforms them into an unmovable barrier. This density is what aids in its amazing sound and thermal insulative properties also.
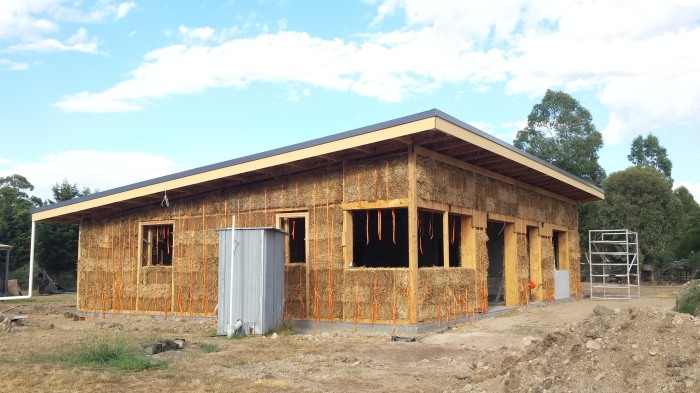
Tensioning is done in 3 stages to ensure maximum compactibility; and though not fire-proof, the fire resistant properties of compacted straw is very good. I like to think that the house now has a kinky side as the tensioning straps look like orange suspenders…. yes I am weird :D The straps will remain to ensure the walls remain steady and the first coat of render will cover them in a few weeks’ time.
Since we don’t have a video camera to take a time-lapse video, I have attempted to (somewhat badly) capture the progress of the walls going up on north-east side of the house.


Some more photos with the changes from the inside, with the kitchen in view.


Helping hands
Thanks to Ryan and Alex for giving up your free to time to come lend us a hand, and Fisher and Robin for trying to help us with our finances! A few hours of help was also received from our local Benny Boy, whose amusing stories and strong arms keep up the building spirit. Matty and I are very grateful :)
Next up, it’s gonna be da na na na… na na hammer render time!


